Configure Row-Level Security (RLS)
- ✔ Desktop Edition
- ✔ Business Edition
- ✔ Enterprise Edition
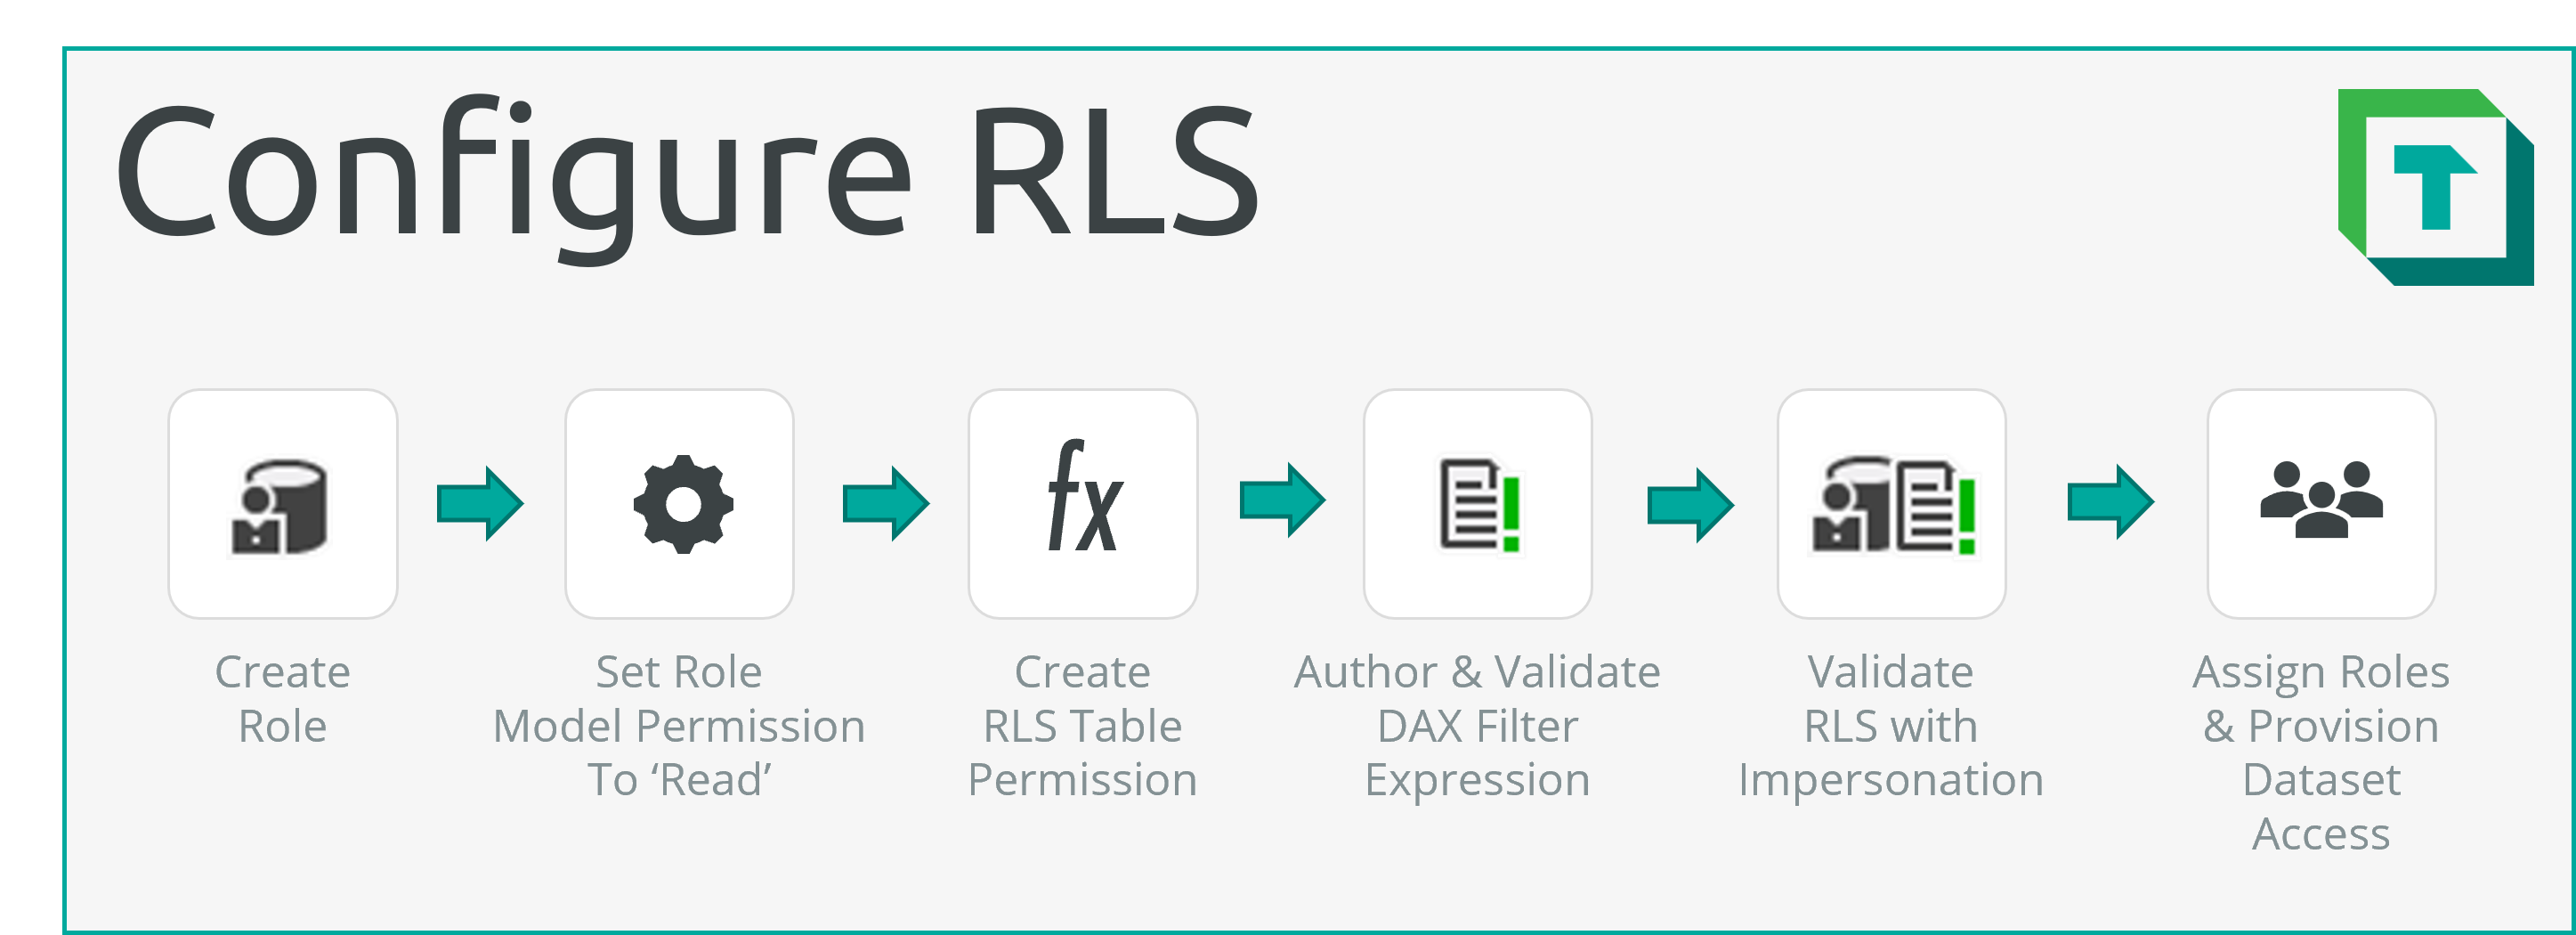
RLS is changed by adjusting the Roles or Table Permissions defined for Tables. This DAX Filter Expression can be viewed in the Expression Editor window when selecting a Table Permission within a particular role. This Filter Expression is the most important piece of the RLS configuration that determines what data is seen by a user.
- About Data Security and RLS/OLS: A functional overview of RLS & OLS.
- Modify/Setup an RLS Configuration (This Article): How to configure RLS in a dataset.
- Modify/Setup an OLS Configuration: How to configure OLS in a dataset.
- Testing RLS/OLS with Impersonation: How to easily validate Data Security with Tabular Editor.
Configuring RLS in Tabular Editor 3
Below is an overview of common changes one might make to existing RLS:
1. Remove a Role
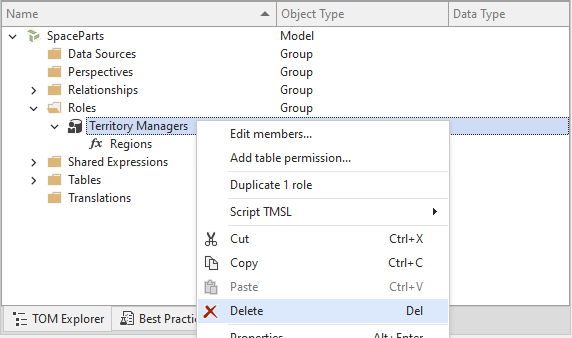
To remove a Role from the model, you can simply delete the Role object with Del or by right-clicking and selecting 'Delete'.
Note
All users assigned to this role will no longer be able to see model data, so long as at least one other Role exists.
2. Add a New Role
To add a Role to the model:
- Right-Click the 'Roles' Object Type: This will open the dialogue to let you create a new Role.
- Select 'Create' > 'Role': Name the new role.

- Set the
Model PermissionProperty toRead: This is necessary for any members of the role to be able to access the dataset at all.

- Set Permissions: Set RLS Table Permissions and/or OLS Object Permissions, as described, below.
3. Remove RLS
To remove RLS from the model, all Table Permissions must be deleted. To remove Data Security from the model, all Roles must be deleted.
Note
Once all roles are deleted, all users will be able to see all data so long as they have Read permissions on the dataset.
4. Modify a Table Permission
To modify an existing Table Permission for a specific role:
- Expand the Role: This will reveal the Table Permissions.
- Select the Table Permission: This will reveal the DAX for the Filter Permission in the Expression Editor.
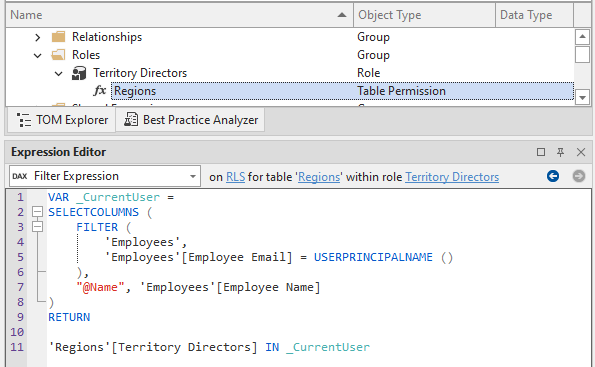
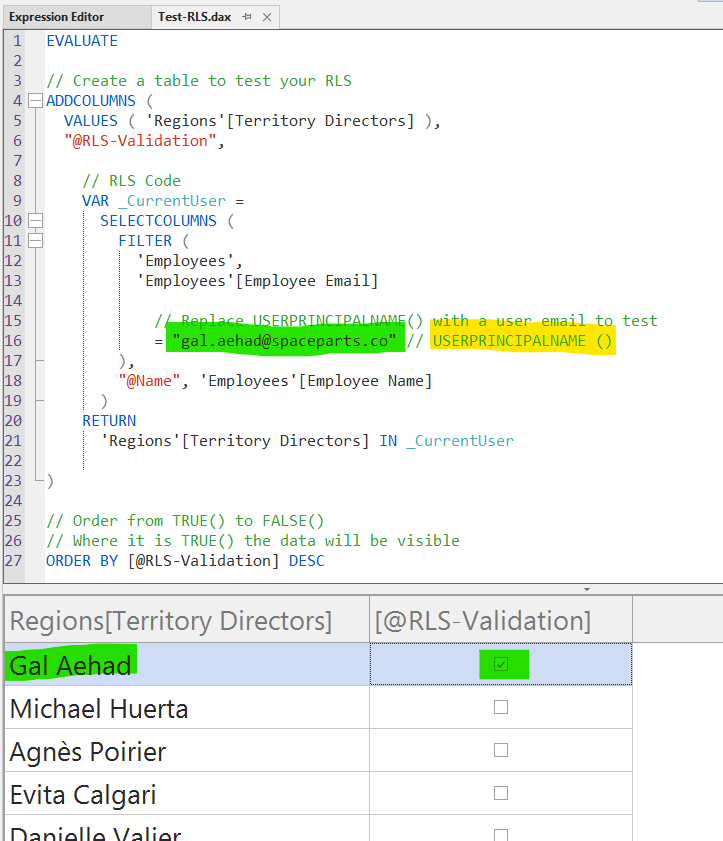
- Adjust the Filter Expression / RLS Table Permissions: It is recommended that you test / validate the DAX before using it:
- Copy the Filter Expression to a new DAX Query window under an
EVALUATEstatement. - Add it as the Expression of an
ADDCOLUMNSstatement iterating over Table, or part of the table. - Execute it and observe the results.
- Replace
USERNAME()orUSERPRINCIPALNAME()in dynamic RLS with a known value from the Security Table. - Re-run the DAX Query and validate that the results appear as expected. Repeat until satisfied.
EVALUATE

// Create a table to test your RLS
ADDCOLUMNS (
  VALUES ( 'Regions'[Territory Directors] ),
  "@RLS-Validation",

    // RLS Code
    VAR _CurrentUser =
      SELECTCOLUMNS (
        FILTER (
          'Employees',
          'Employees'[Employee Email]

            // Replace USERPRINCIPALNAME() with a user email to test
            = "gal.aehad@spaceparts.co" // USERPRINCIPALNAME ()
        ),
        "@Name", 'Employees'[Employee Name]
      )
    RETURN
      'Regions'[Territory Directors] IN _CurrentUser

)

// Order from TRUE() to FALSE()
// Where it is TRUE() the data will be visible
ORDER BY [@RLS-Validation] DESC
5. Add a New Table Permission to a Role
To add a new table permission:
- Right-Click the Role: Select 'Add table permission...'

- Select the Table and press 'OK': Select the table for which you want to create the permission.
- Write the Filter Expression / RLS Table Permissions: Write the DAX for the filter expression. As above, you want to validate this filter expression (See Figure 5):
- Copy the Filter Expression to a new DAX Query window under an
EVALUATEstatement. - Add it as the Expression of an
ADDCOLUMNSstatement iterating over Table, or part of the table. - Execute it and observe the results.
- Replace
USERNAME()orUSERPRINCIPALNAME()in dynamic RLS with a known value from the Security Table. - Re-run the DAX Query and validate that the results appear as expected. Repeat until satisfied.
6. Assign or Remove Users from a Role
You can assign and remove users/groups from roles through Tabular Editor.
- Right-Click the Role, select Edit members...

- Click the dropdown button on the 'Add Windows AD Member' button and choose Azure AD Member:
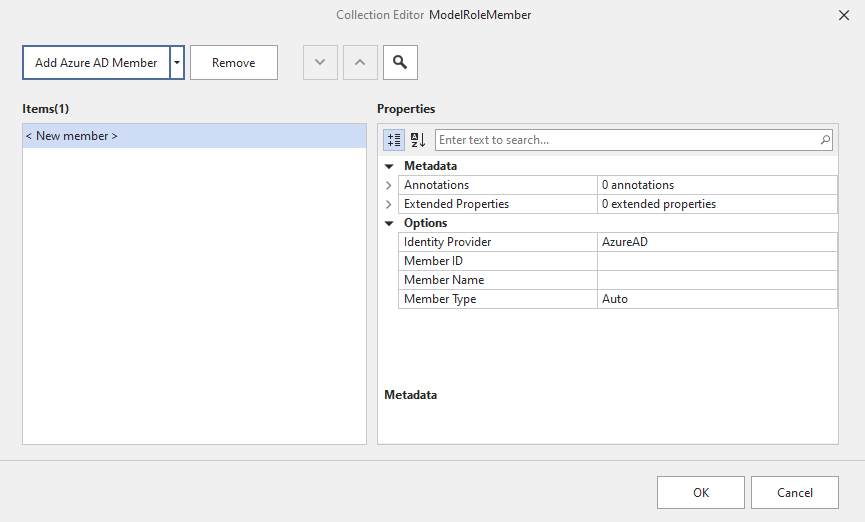
- Specify the Azure AD user identity (typically, the user e-mail address) as the Member Name property.
- Click OK.
- Save the model.
Important
If your organisation is using on-premises Active Directory with SQL Server Analysis Services, you will need to use the Windows AD Member option instead of Azure AD Member.
Note
Once a Power BI dataset has been published to the Power BI Service, you can also manage role members through the Dataset Security settings. Alternatively, you can manage role members through SQL Server Management Studio (this applies to AAS/SSAS models in addition to Power BI dataset).